From Art to Life
Originally posted 4/4/2017
Note: All reference photos used for my artwork are either my own or my sister's (used with permission, of course), unless otherwise stated.
This Wednesday's Work in Progress will be a blog post. To kick things off, I thought I would walk through the process of a completed painting to give you an idea of how I do things. I thought I would use the piece currently on display on the Easel page, "Tender Moment", in order to compliment it by giving the behind the scenes of its creation. Descriptions are found under each image.
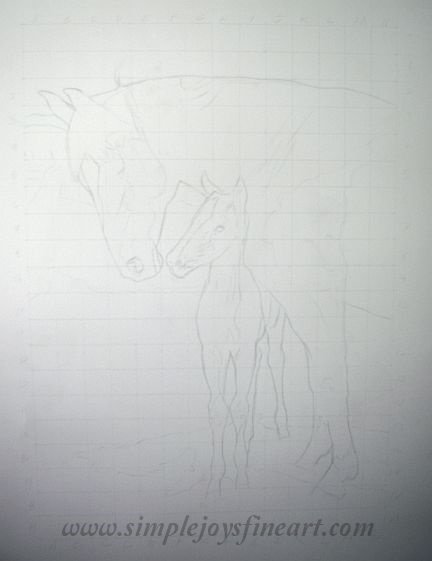
I work from reference photos and it is common for me to graph out the subject onto the paper, particularly with more complex pieces. I mostly just want to lay out the outside lines. I do not do this with charcoal and graphite drawings as I believe in good draftsmanship, but colored pencil involves so many hours of coloring and layering that I don't like to take chances that an error may ruin a piece, such as black shadow being left on white! The image above has had the lines darkened significantly so that you can see them, however, they are put onto the paper very lightly and erased as soon as I have had a chance to block in a bit of color to make sure the technical parts are all correct. Incidentally, this is not my favorite part of the process! I try to rely on my eye as much as I can during this phase as the squares are distracting and can make one lose sight of the big picture.
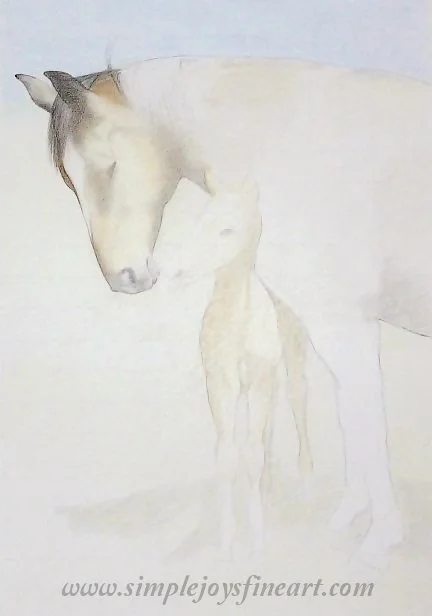
In this image, I'm starting to block in some color. I've got some base colors in and have started to define the shaded areas.
Here, I am continuing to block in color, but you can see my focus has now shifted to the horses' heads, mainly the mare's. I always like to get the heads, particularly the eye areas, done first as this is the most critical part of any painting. If eye and expression are not correct, it won't matter how good the rest of it is! That is what draws people!
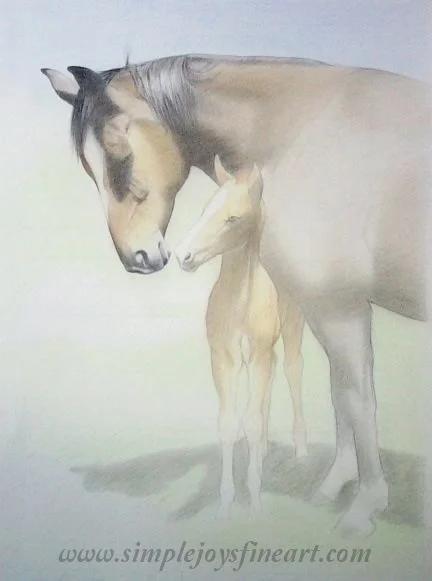
Shadow areas continue to be defined and darkened. This image appears a bit grainy. Part of it is the photo itself, but also because I've been using the side of the pencil on the larger areas to get the color in. It will be smoothed out as I go along!
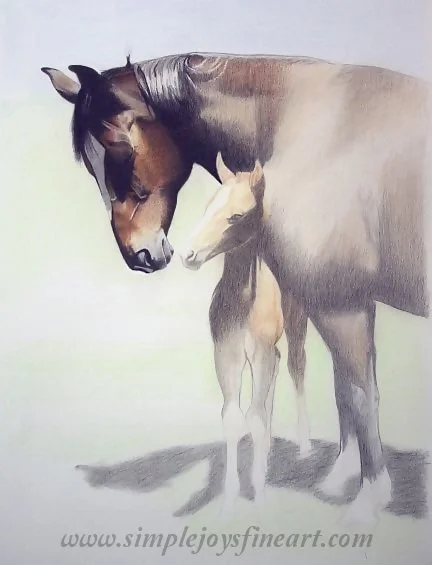
I've returned to the mare's head to further add color and bring out the darks and lights to really make it pop.
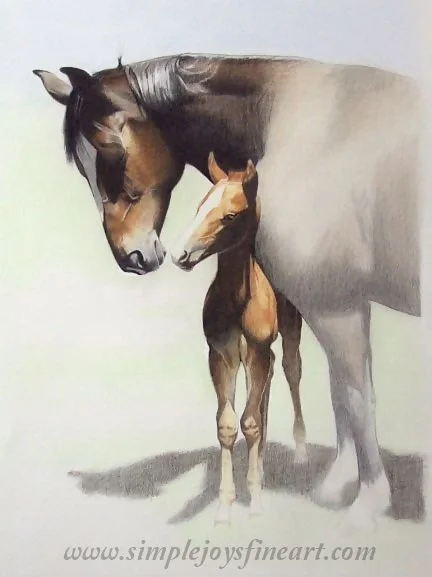
And it's on to the foal! This was the funnest part of the whole piece! I loved seeing this little one coming to life! He also came together easily and I was able to finish him up rather quickly.
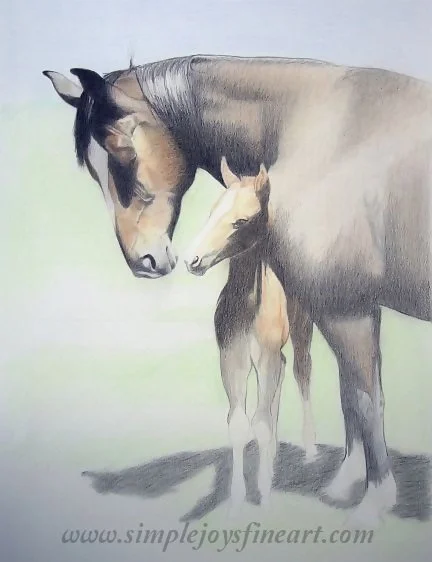
Next was drudgery. Time to fill in the mare's body colors. Larger areas are always harder. You can once again see the grainier look which were smoothed out later on once I knew I had gotten the values right. You can see I have also darkened the shadow on the ground.
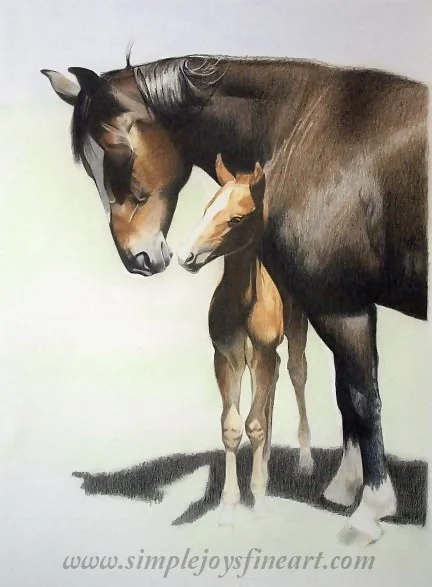
Almost done! My least favorite part is always saved to the end- landscape! I've gotten the greens and ground started blocking in and I've finished the sky.
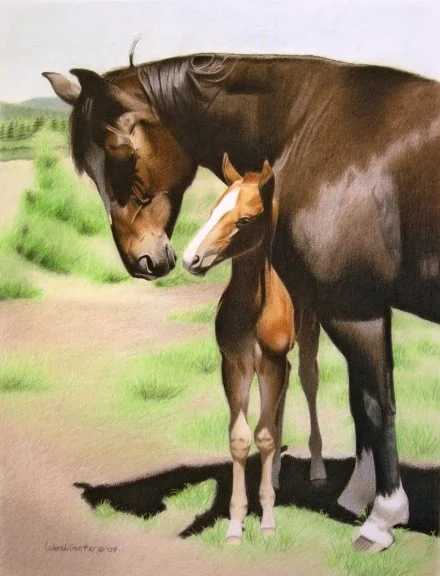
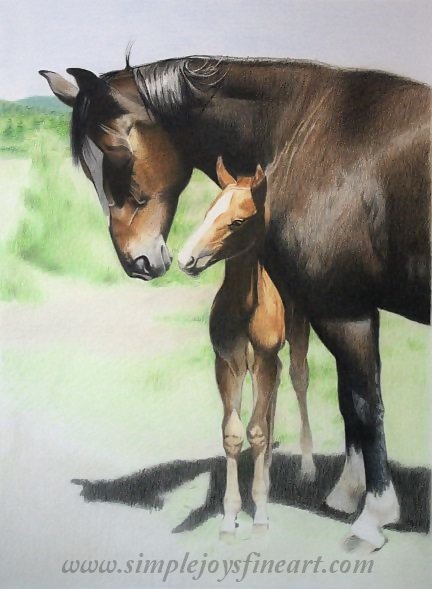
And it's all done!
The final stage, fine tuning, is actually one of the longest steps. This is the time when I smooth out all the grainy sections and make sure any small dots of paper still showing through are filled. It is also where I work to make sure that my darks are dark and my lights are light! Note how dark the ground shadow has gotten. Fine tuning is taking a piece one step further than done to make sure it looks it's best! This is the time I step away (or leave the studio) and come back the most! Anything that needs more work becomes obvious this way. When it gets to the point that I can't believe I did that, it's done!
I hope you found this helpful and I am looking forward to presenting new works in progress!
Prints of "Tender Moment" can be found in the Shop!